For awhile now I wanted to bring in a black-n-white piece of wall art in the master bedroom. It had to be something other than a canvas painting, mirror or photo frames, since we already had those. I started looking for different materials for wall art- metal, wood, ceramic...and finally settled for a vinyl decal.
Vinyl decals come in SO many varieties, there are websites full of options and I kept browsing and browsing. Finally I realized that we need to bring in the 'glamour' factor in our room and decided on a chandelier decal.
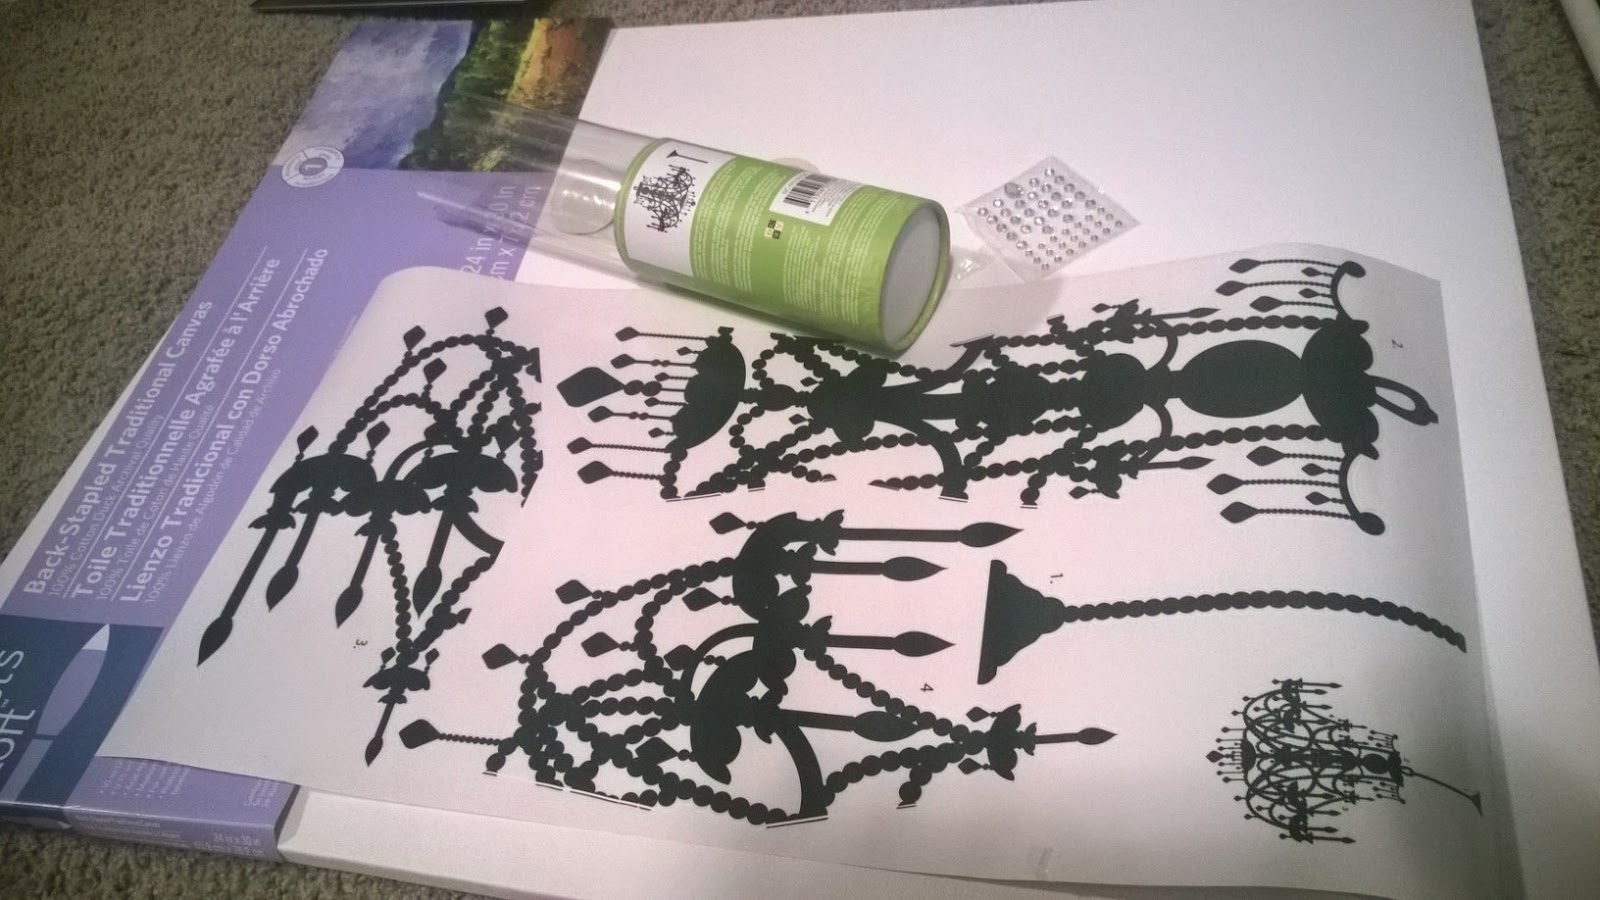
At one of my Michaels haul's, I picked up the decal, a big piece of canvas and some jewels (I needed jewels for another project too, you will hear about that soon ;) ). As part of my long-term plan, I did not want to apply the decal directly on the wall because I wanted to keep the option of moving it in the future. This is one of the rules that I have been applying to all my decor pieces - nothing should be permanent, I want to always have the option of moving pieces around.
Honestly, this was a 20 minute project. I started by sticking the decal on the canvas. This one came in 4 pieces and I just had to put it together one by one.


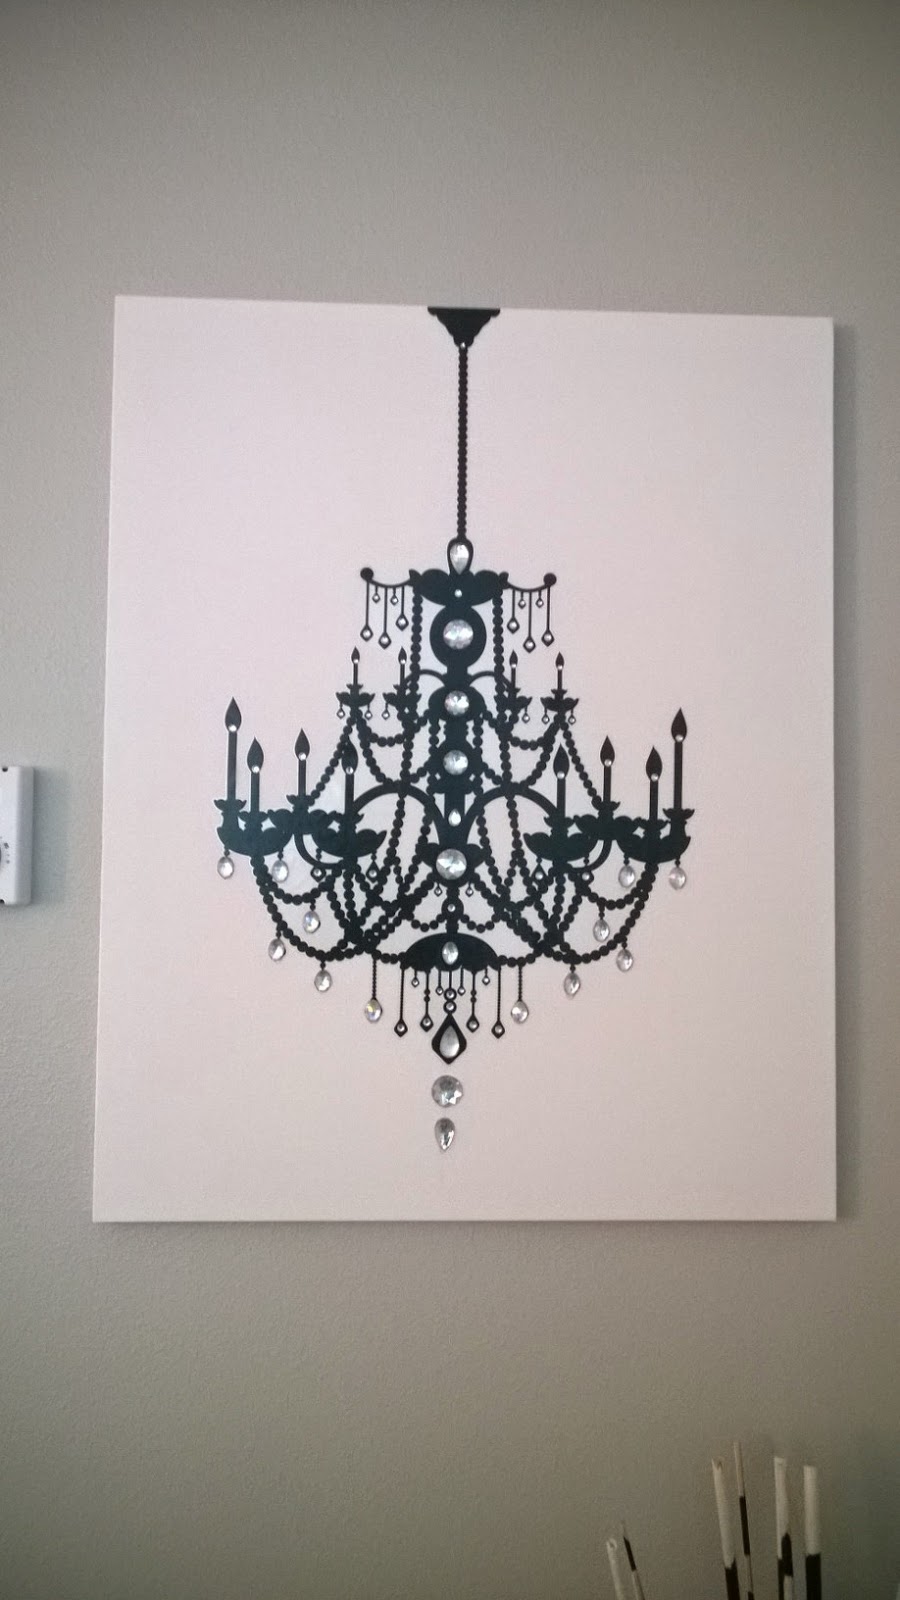
Once the glue was dry, it was ready to go on the wall. It was super light-weight and all I needed was a couple of push-pins.

Below are a couple of angles to see how it fits in with the rest of the room.


I have to say that I have a new found love for vinyl decals..they are so much fun and add a lot of personality to your space. If you ever rocked the decal look in your house, do share!
Vinyl decals come in SO many varieties, there are websites full of options and I kept browsing and browsing. Finally I realized that we need to bring in the 'glamour' factor in our room and decided on a chandelier decal.
At one of my Michaels haul's, I picked up the decal, a big piece of canvas and some jewels (I needed jewels for another project too, you will hear about that soon ;) ). As part of my long-term plan, I did not want to apply the decal directly on the wall because I wanted to keep the option of moving it in the future. This is one of the rules that I have been applying to all my decor pieces - nothing should be permanent, I want to always have the option of moving pieces around.
Honestly, this was a 20 minute project. I started by sticking the decal on the canvas. This one came in 4 pieces and I just had to put it together one by one.
Once I got the decal in place, I played around with the jewels. I positioned/re-positioned them to get 'the look', before glueing them down. I used a heavy-duty glue to make sure that they never fall off!
Below are a couple of angles to see how it fits in with the rest of the room.
I have to say that I have a new found love for vinyl decals..they are so much fun and add a lot of personality to your space. If you ever rocked the decal look in your house, do share!


